How to Fix Underexposed Night Photos in Lightroom (VIDEO)
Nighttime photography can be a lot of fun because it provides numerous opportunities to capture compelling images in the field or on the street. Familiar scenes that may appear boring during the day are transformed into magical tableaus once the sun drops below the horizon.
But here’s the rub: the same neon signs, streetlamps, and brightly-lit windows that everyone finds so captivating can also make it extremely difficult to determine a balanced exposure. And most of the time this means images that look far darker than what you saw through the viewfinder.
But all is not lost because the following video from French-born Serge Ramelli describes “how to retouch an underexposed photo like a pro.” He’s is a noteworthy cityscape photographer now living in the U.S. whose sought-after images are displayed in over 120 galleries across the globe.

Ramelli summarizes today’s eye-opening episode like this: “I’ll provide step-by-step instructions for transforming a severely underexposed photo into a stunning gallery-worthy image.” Along the way you’ll learn his preferred methods for correcting exposure, perfecting white balance, and mastering dodge and burn.
Ramelli also demonstrates his strategy for applying sharpening and noise reduction to images that are overly dark. He covers all these topics and more in barely nine minutes. The example he uses is a well-composed street slot with a curving cobblestone road that effectively guides you through the glittering village.
The problem is an exposure mistake that makes all the enticing details difficult or impossible to see—thereby spoiling the unprocessed shot. If you want a one-click solution, simply grab Ramelli’s free Lightroom AI presets using a link beneath the video. The point of this lesson, however, is teaching you how to rehabilitate an image yourself so that you understand the necessary adjustments and enhancements that are involved.

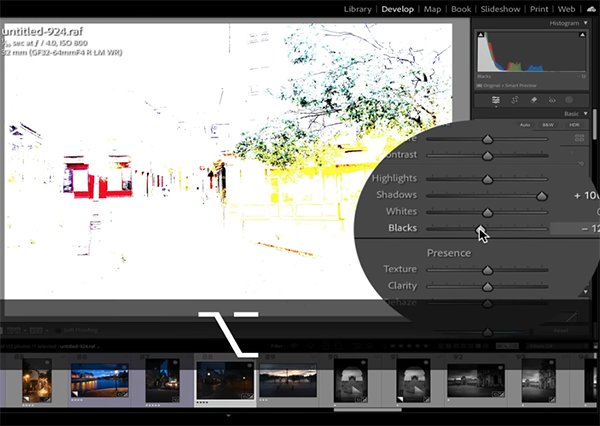
Ramelli begins by adjusting the black points in the photo before boosting the whites to “reveal the photo.” Then he uses simple slides to modify white balance, color intensity, and other key variables in a manner that photographers of all skill levels can handle with ease. A few simple masks for local enhancements also factor into the equation.
A quick glance at Ramelli’s before/after examples confirms the spectacular results you can expect by following his straightforward advice. Be sure to take a close look at his popular YouTube channel and explore the many how-to videos you find.
And don’t miss a tutorial we featured with another post-processing expert who demonstrates a simple-but-obscure masking trick that many photographers overlook that takes barely five minutes to learn. You can use it in Lightroom, Photoshop, and Adobe Camera Raw.

You May Also Like

3 Beginner Photo Exposure Mistakes: How to Fix Them Fast (VIDEO)

Photoshop Basics: The Easy Way Select and Cut Out Objects (VIDEO)
